How to Optimize an Elementor Website with LiteSpeed Cache: A Practical Page-Speed Guide
A hands-on guide to optimizing Elementor with LiteSpeed Cache: which Elementor settings to change, safe LiteSpeed settings, what not to enable blindly, and how to test Core Web Vitals.
How to Optimize an Elementor Website with LiteSpeed Cache: A Practical Page-Speed Guide
Most “LiteSpeed Cache settings” articles online are a long list of toggles with the same advice: turn everything on and watch your score go green.
I’ve done that on client sites. It usually ends with a mobile menu that won’t open, a contact form that stops submitting, or a hero section that loads unstyled for half a second. The PageSpeed score looked great. The website didn’t.
This guide is how I actually set up LiteSpeed Cache on Elementor sites I build and maintain. It’s staged on purpose: get a stable, cached baseline first, then add the aggressive optimizations one at a time, testing as you go.
Note: Plugin menus and defaults change over time. I’ll keep this post updated as LiteSpeed Cache and Elementor evolve. The last-updated date is at the top.
Why Elementor Sites Get Slow
Elementor isn’t “bad for speed,” but it makes it very easy to build heavy pages without noticing. The usual culprits:
- Large DOM size. Every section, container, column and widget adds wrapper elements. Nest containers inside containers inside containers and a simple landing page can end up with thousands of DOM nodes.
- Unused CSS and JS. Elementor, Elementor Pro, your theme and every add-on pack load their own stylesheets and scripts, often on pages that don’t use them.
- Animations and heavy widgets. Entrance animations, sliders, carousels, Lottie files, video backgrounds and counters all cost JavaScript and rendering time.
- Large images. A 3000px, 2MB PNG hero image scaled down to fit a 1200px container is still a 2MB download.
- Third-party scripts. Chat widgets, analytics, tag managers, embedded maps, booking widgets and social feeds are often the biggest drag, and they’re outside your control.
A caching plugin helps with some of this. It doesn’t fix a page with 40 nested containers and a 4MB background video. Keep that in mind as you go.
Before You Change Anything: Record a Baseline
Before you touch a single setting:
- Run your key pages (home, a service page, a blog post, contact) through PageSpeed Insights.
- Record mobile and desktop scores separately, plus LCP, CLS, INP/TBT and total page weight.
- Note the field data (real-user Core Web Vitals) if your site has enough traffic to show it.
- Take screenshots. You’ll want them for comparison, and for the client.
Without a baseline, you have no way to know which change helped and which one broke something.
Step 1: Adjust Elementor First
If LiteSpeed Cache is going to handle image loading and lazy loading, Elementor shouldn’t be doing the same job. Two plugins optimizing the same thing is a common source of flickering images and odd layout shifts.
Go to Elementor → Settings → Performance / Features:
| Setting | Value |
|---|---|
| Optimized Image Loading | Disable |
| Optimized Gutenberg Loading | Enable |
| Inline Font Icons | Active |
| Additional Custom Breakpoints | Inactive |
| Lazy Load Background Images | Inactive |
| Element Caching | Active |
| CSS Print Method | Leave current/default |
LiteSpeed’s own Elementor compatibility notes recommend disabling Optimized Image Loading, enabling Optimized Gutenberg Loading, keeping Inline Font Icons active, setting Lazy Load Background Images to inactive, and not changing CSS Print Method if the frontend already works. With those in place, LiteSpeed says its minification, combination, lazy loading and placeholder features can be used without conflicting with Elementor.
Element Caching is Elementor’s own feature rather than something LiteSpeed lists, but it works well alongside page caching in my experience. If you ever see dynamic content (like a “latest posts” widget) showing stale data, check this setting first.
Elementor-side cleanup that matters
Settings are only half the job. On the Elementor side I also:
- Remove unnecessary widgets and wrappers. If a container only exists to hold another container, flatten it.
- Avoid excessive nesting. Flexbox containers make it easy to create layouts with far fewer elements than the old section/column model. Use that.
- Use Global Fonts and Global Colors. Consistent global styles mean less repeated CSS and fewer font variations to load.
- Limit font families and weights. Two families and three or four weights is plenty for most sites.
- Question every animation. Entrance animations on every block rarely help conversions and always cost performance.
- Disable add-on widgets you don’t use. Most Elementor add-on packs let you turn off individual widgets so their assets don’t load.
Step 2: LiteSpeed Cache → Cache
This is the core page cache. Start here:
| Setting | Value |
|---|---|
| Enable Cache | ON |
| Cache Logged-in Users | ON |
| Cache Commenters | ON |
| Cache REST API | ON |
| Cache Login Page | OFF |
| Cache Mobile | OFF initially |
Why Cache Logged-in Users is OFF: while you’re actively building or editing in Elementor, you gain very little from caching your own logged-in session, and it adds one more variable when you’re trying to figure out why a change isn’t showing.
Why Cache Mobile is OFF (for now): Elementor sites are responsive, so the same HTML serves both mobile and desktop. According to LiteSpeed’s Cache documentation, Cache Mobile is mainly for non-responsive themes or sites with mobile-specific content, though it’s also relevant if you later use UCSS, CCSS or Guest Mode + Guest Optimization. It creates additional cache varies, so only turn it on when one of those applies.
TTL: leave it alone
Leave the TTL values at their defaults. Don’t set them to huge numbers “for more caching.” LiteSpeed purges the relevant cached pages automatically when you update content, so the defaults work fine for most sites.
Step 3: Cache → Browser
| Setting | Value |
|---|---|
| Browser Cache | ON |
| Browser Cache TTL | 31557600 |
That’s one year in seconds. LiteSpeed’s documentation lists 31557600 as the default and recommended value. Browser caching stores static files like images and CSS on the visitor’s device, so repeat visits are much faster.
Step 4: Page Optimization → CSS Settings
For the first pass, be conservative:
| Setting | Value |
|---|---|
| CSS Minify | ON |
| CSS Combine | OFF |
| Generate UCSS | OFF initially |
| UCSS Inline | OFF |
| CSS Combine External and Inline | OFF |
| Load CSS Asynchronously | OFF initially |
Minify is safe. It only strips whitespace, line breaks and comments.
Combine I keep off. On modern HTTP/2 and HTTP/3 servers, many smaller files load in parallel just fine, so combining everything into one file gives much less benefit than it used to. On Elementor sites, a combined CSS file also makes layout bugs much harder to track down. LiteSpeed ships with CSS Combine off by default (Page Optimization docs).
UCSS (Unique CSS) comes later. UCSS is a QUIC.cloud service that generates a trimmed CSS file per page containing only the styles that page needs. It can make a big difference, but LiteSpeed notes it needs storage for at least one CSS file per page (two with Cache Mobile), and styles that only appear after interaction may need to be allowlisted (Page Optimization docs). That’s exactly why it’s a stage-two setting.
Step 5: Page Optimization → JS Settings
| Setting | Value |
|---|---|
| JS Minify | ON |
| JS Combine | OFF |
| JS Combine External and Inline | OFF |
| Load JS Deferred | OFF initially |
This looks conservative, and it’s meant to be. A typical Elementor site depends on JavaScript for:
- mobile menus and hamburger toggles
- sticky headers
- sliders and carousels
- popups
- forms
- accordions and tabs
- animations
- WooCommerce carts
- booking widgets
Deferring or delaying the wrong script can break any of them.
Deferred vs Delayed
When you do move on to JS loading, it helps to know the difference. Per LiteSpeed’s docs:
- Deferred runs JavaScript as soon as the HTML has finished loading.
- Delayed doesn’t run JavaScript until it detects user activity, like a click or mouse movement.
Delayed has more potential for improving scores because it can take JavaScript out of the page-speed calculation almost entirely. It’s also the setting most likely to cause “the menu doesn’t open on first tap” bugs. If something breaks, use JS Deferred/Delayed Excludes to exclude the specific script rather than turning the whole feature off.
Step 6: Page Optimization → HTML
| Setting | Value |
|---|---|
| HTML Minify | ON |
Leave the more obscure HTML options at their defaults for now.
Step 7: Page Optimization → Media
This is where LiteSpeed takes over the lazy loading you just turned off in Elementor.
| Setting | Value |
|---|---|
| Lazy Load Images | ON |
| Basic Image Placeholder | Default |
| Responsive Placeholder | ON |
| Lazy Load Iframes | ON |
| Add Missing Sizes | ON |
Don’t lazy-load your hero image
This is the most common mistake I see. Your first visible image, usually the hero, is often your Largest Contentful Paint (LCP) element. If it’s lazy-loaded, the browser waits before fetching it, and your LCP gets worse while you think you’re optimizing.
The same applies to your logo if you notice it appearing late or flashing on load.
Exclude them under LiteSpeed Cache → Page Optimization → Media Excludes. LiteSpeed’s docs describe Lazy Load Image Excludes as the place for images visible in the initial mobile and desktop viewport, such as a site logo, and it accepts full URLs or partial strings, one per line. There are also class-name and parent-class-name excludes, which work nicely with Elementor: give your hero image widget a CSS class like no-lazy-hero and exclude that class (Page Optimization docs).
Step 8: Image Optimization (Later)
Don’t touch this heavily yet. Eventually, LiteSpeed with QUIC.cloud can generate WebP/AVIF versions, optimize the originals and serve the right format automatically. Image Optimization is one of the features that requires QUIC.cloud services to be enabled (General settings docs).
First, get caching and front-end optimization stable. In the meantime, the biggest image win is free: upload images at the size they’re actually displayed.
Step 9: Database
For now, don’t enable automatic database cleaning. You can manually clear old revisions and expired transients later.
Database cleanup is good housekeeping, but it’s not going to fix an Elementor page that takes four seconds to render.
Step 10: CDN
Leave CDN off for now. Don’t connect QUIC.cloud or Cloudflare yet.
The goal of the first stage is a clean, testable baseline:
WordPress → Elementor → LiteSpeed server cache
Once that’s stable, adding a CDN is a separate, measurable step.
Step 11: Guest Mode and Guest Optimization
| Setting | Value |
|---|---|
| Guest Mode | OFF |
| Guest Optimization | OFF |
Guest Mode serves a default cached version of the page to first-time visitors, then loads the correct version with AJAX. Guest Optimization goes further, serving the most heavily optimized version to bots, certain user agents and first visits, which includes tools like PageSpeed Insights and GTmetrix.
LiteSpeed is refreshingly honest about this in its General settings documentation: Guest Optimization produces excellent page-speed scores but may not give human visitors the same experience, and it can mask real problems. Their own advice is to turn it off, fix the issues page-speed tools report, and then turn it back on.
I don’t want PageSpeed giving me a beautiful number while the actual site has a JavaScript or styling problem. So it stays off until everything else is solid.
What NOT to Enable Blindly
If you only take one section from this post, make it this one:
- JS Delay breaking menus and forms. Delayed JS is the biggest score booster and the biggest source of broken Elementor mobile menus, popups and form submissions.
- CSS optimization breaking layouts. UCSS and async CSS can drop styles that only appear on hover, scroll or interaction, leaving you with unstyled dropdowns or a flash of unstyled content.
- Combining files when HTTP/2/HTTP/3 makes it unnecessary. Combining adds troubleshooting pain for little gain on modern servers.
- Aggressive lazy loading above the fold. Lazy-loading the hero or logo hurts LCP.
- Guest Optimization as a “score fix.” It can make test tools happy while real visitors see something different.
After Saving: Purge and Test
Go to LiteSpeed Cache → Toolbox → Purge → Purge All. Then open the site in an Incognito window so you see what a logged-out visitor sees.
Desktop checklist
- Header
- Navigation and dropdowns
- Hero section
- Sliders
- Forms (actually submit one)
- Buttons and links
- Footer
Mobile checklist
- Hamburger menu, especially the Elementor mobile menu
- Sticky header
- Accordions and tabs
- Popups
- Animations
- Forms
Test on a real phone, not only in browser dev tools.
Critical Check: Is Page Caching Actually Working?
This one catches a lot of people out. LiteSpeed Cache’s page caching needs a LiteSpeed server or QUIC.cloud CDN. According to LiteSpeed’s installation docs, you can install the plugin on Apache or nginx, but none of its caching functionality works there without a LiteSpeed server or QUIC.cloud CDN. The optimization features (minify, lazy load and so on) still work.
In other words: if your host runs plain Apache or nginx, installing the plugin gives you page optimization, but not server-level page caching.
To check, go to LiteSpeed Cache → Toolbox → Report and look for Server Software. You can also check the response headers of a page in your browser’s dev tools (Network tab) for an x-litespeed-cache: hit header on a second load.
If you’re not on LiteSpeed, your options are to ask your host about LiteSpeed Web Server, use QUIC.cloud CDN (which enables LSCWP caching regardless of the backend server), or use a different caching solution for page caching.
My Testing Methodology
The rules I follow on every site:
- Baseline first. Record scores and Core Web Vitals before any change.
- Make one change at a time. If you enable five settings and something breaks, you won’t know which one did it.
- Purge after every change. Otherwise you’re testing the old cached page.
- Test mobile first. Mobile scores are what matter most for most sites, and mobile is where JS problems show up.
- Test forms and navigation every time. Not just “does it look right,” but “does it work.”
- Use PageSpeed Insights and Lighthouse, and run each test more than once. Single runs vary. Take the median of three.
- Compare Core Web Vitals, not just the score. LCP, CLS and INP tell you what actually changed for users.
Real Example: Before and After
To see what these optimizations look like in practice, I tested a real Elementor website after applying the safer LiteSpeed Cache configuration described in this guide.
The goal wasn’t simply to chase a 100/100 PageSpeed score. I wanted to improve the site’s loading behavior while keeping the navigation, forms, responsive layout, animations, and other interactive elements working correctly.
PageSpeed Insights Results
Desktop — Performance Test
| Metric | Result |
|---|---|
| Performance | 96 |
| Accessibility | 87 |
| Best Practices | 100 |
| SEO | 85 |
| First Contentful Paint (FCP) | 0.8 s |
| Largest Contentful Paint (LCP) | 0.8 s |
| Total Blocking Time (TBT) | 20 ms |
| Cumulative Layout Shift (CLS) | 0.006 |
| Speed Index | 1.7 s |
Note: PageSpeed Insights results are lab measurements and can vary between runs. These results were captured during testing and should be treated as a snapshot rather than a permanent score.
What Changed
The optimization process focused on reducing unnecessary browser work while avoiding aggressive settings that could interfere with Elementor.
The main changes included:
- Enabled LiteSpeed page caching where supported
- Enabled browser caching
- Enabled CSS and JavaScript minification
- Kept CSS and JavaScript combination disabled
- Enabled HTML minification
- Enabled lazy loading for appropriate images and iframes
- Added missing image dimensions
- Avoided lazy loading the main above-the-fold content
- Kept advanced CSS optimization such as UCSS disabled initially
- Kept JavaScript delay disabled during the initial optimization stage
- Purged the cache after configuration changes
- Tested the website again after optimization
The Result
The final Lighthouse test produced a 96 Performance score, with particularly strong loading metrics:
- FCP: 0.8 seconds
- LCP: 0.8 seconds
- TBT: 20 ms
- CLS: 0.006
- Speed Index: 1.7 seconds
The important point here is that the result was achieved without immediately enabling every aggressive LiteSpeed optimization.
For an Elementor website, that distinction matters. A configuration that produces a high laboratory score but breaks a navigation menu, form, popup, animation, or responsive layout isn’t a successful optimization.
What I Would Improve Next
A 96 Performance score is already a strong result, but there are still areas that can be investigated.
The next stage would be to examine the remaining Lighthouse opportunities and determine whether they represent genuine user-facing problems or simply opportunities for further laboratory optimization.
Potential next steps include:
- Testing deferred and delayed JavaScript carefully
- Reviewing unused CSS and JavaScript
- Evaluating UCSS where appropriate
- Optimizing remaining images and serving modern formats such as WebP or AVIF
- Reviewing third-party scripts
- Checking the Elementor DOM structure for unnecessary nesting
- Comparing results across multiple runs and devices
I would not enable all of these at once.
The same process applies here as with the initial optimization: make one meaningful change, purge the cache, test the website, check functionality, and measure the result.
Screenshot
PageSpeed Insights result from the test website:
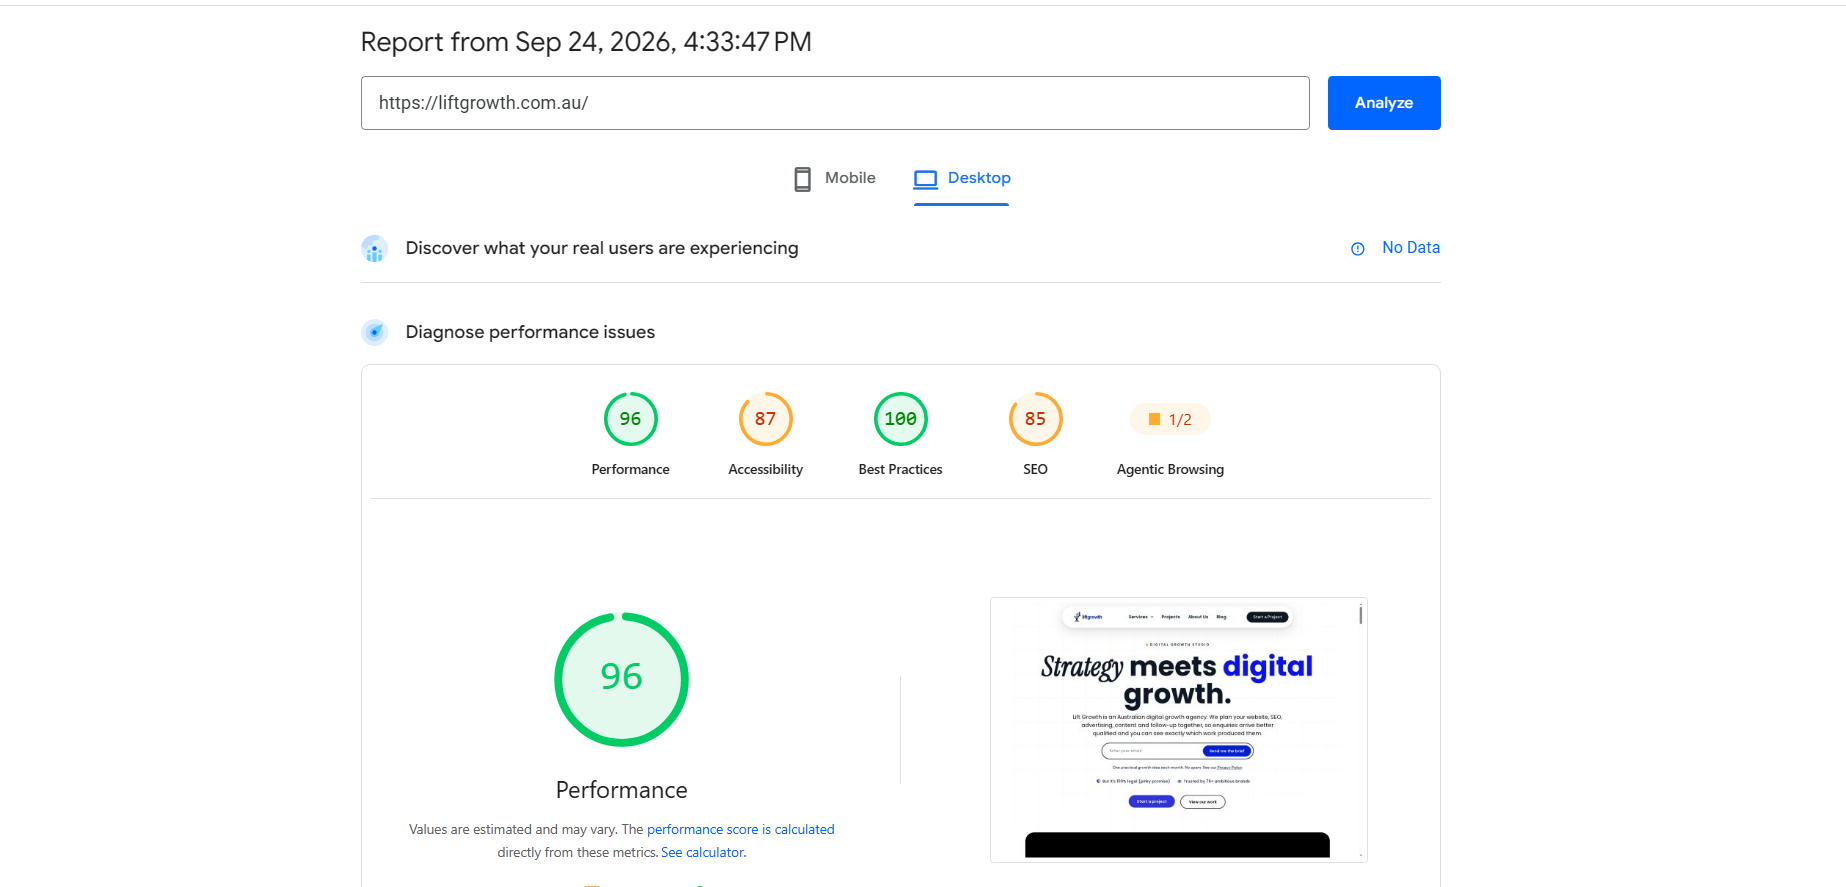
The screenshot is included alongside the measured values so the result can be independently understood in the context of the test.
Stage Two: What Comes Next
Once the baseline is stable and tested, the next round is:
- Load JS Deferred → Delayed, with excludes for anything that breaks.
- Generate UCSS, with allowlisted selectors for interactive elements.
- WebP/AVIF image optimization through QUIC.cloud.
- CDN: QUIC.cloud or Cloudflare.
- Guest Mode / Guest Optimization, only after real issues are fixed.
Each gets the same treatment: one change, purge, test, measure.
Final Thoughts
LiteSpeed Cache is one of the best free tools for speeding up an Elementor site, but only when it works with Elementor instead of against it. Turn off Elementor’s overlapping optimizations, start with safe settings, keep your hero image out of lazy load, and add aggressive options one at a time.
A green PageSpeed score is nice. A fast site where the menu opens, forms submit and the layout holds together is the real goal.
If you’re working on an Elementor site that’s still slow after all this, the problem is usually in the build itself (DOM size, heavy widgets, third-party scripts), not the cache settings. That’s the kind of thing I help clients with. Get in touch if you’d like a second pair of eyes.
Sources
- LiteSpeed Documentation: Third Party (Elementor compatibility)
- LiteSpeed Documentation: Cache settings
- LiteSpeed Documentation: Page Optimization
- LiteSpeed Documentation: General (Guest Mode & Guest Optimization)
- LiteSpeed Documentation: Installation (server requirements)
- LiteSpeed Documentation: Media troubleshooting